You booked a beautiful glamping stay, pictured cozy mornings on the deck, and then it hit you: there’s no kitchen. No stove, no sink, maybe not even a fridge. So what exactly will you eat for three days? The good news is that learning to plan meals at a glamping site without a kitchen is far easier than it sounds, and it doesn’t mean living on granola bars alone.
This guide walks you through the whole process, step by step. You’ll figure out what amenities your site actually offers, build a simple meal plan before you leave, and stock up on no-cook meals that genuinely satisfy. We’ll also cover cooler strategy for keeping food safe without a fridge, how to match your menu to the season, and the small set of gear worth packing. With a bit of prep at home, eating well outdoors becomes one of the best parts of the trip.
What ‘No Kitchen’ Actually Means at a Glamping Site
Before you write a single item on your grocery list, find out what your glamping site actually provides. Listings vary enormously, and the phrase “no kitchen” can mean very different things. Some sites set you up with a fire pit or a communal grill you can share with other guests. Others give you nothing more than a picnic table and a patch of grass. Read the listing carefully, and if anything is unclear, message the host or site manager directly before you book or pack.
Water and cold storage matter most
Two details make the biggest difference to your meal plan. First, ask whether the site has potable water. If it doesn’t, you’ll need to bring your own drinking and cooking water for the whole stay. Second, find out whether there’s a fridge available, or just a flat, shaded surface where a cooler can sit. That answer shapes how much fresh food you can realistically bring and how often you’ll need to restock ice.
Once you know exactly what exists on site, plan around it. Match your meals to the amenities you actually have, not the ones you hope for. If there’s no fire pit, skip the foil-packet dinners and lean on no-cook options instead. A few minutes of checking now saves you from standing hungry at an empty picnic table later.
Build a Simple Meal Plan Before You Go
A little planning at home turns a kitchenless glamping stay from stressful into simple. Instead of standing at a picnic table wondering what to eat, you’ll know exactly what’s coming and where it’s packed. Sit down with a notepad about a week out and map everything out. If you’re not sure what weather to expect, the month-by-month guide to glamping seasons in the US can help you decide whether to plan hot meals or cool ones. Then work through these steps:
- Write out every meal. List breakfast, lunch, dinner and snacks for each day of your 2-3 night stay. Seeing it on paper reveals gaps, like the afternoon you arrive with nothing planned for dinner.
- Aim for one no-cook meal per day. This reduces your reliance on equipment you may not have, and it means one meal a day requires zero effort, fire, or fuel.
- Budget and portion at home. Plan on roughly $15-25 per person per day for food. Portion ingredients into exact meal-sized amounts at home so you’re not dragging a whole bag of rice into the woods.
- Prep and pack 1-2 days before departure. Put ingredients into labeled containers, one per meal, so grabbing what you need at the site takes seconds.
The payoff is huge. Instead of improvising meals at the site, you’ll simply open a container labeled “dinner, day two” and everything you need is right there. It also stops you from overpacking food you’ll never eat, which is the most common mistake on short trips. Extra food means extra weight in the cooler and less room for ice, so a tight menu actually keeps your perishables safer too. Write your plan on your phone or a card tucked into the cooler, and check off each meal as you go. Ten minutes of planning at the kitchen table buys you a weekend of easy, stress-free eating.
No-Cook Meals That Actually Satisfy
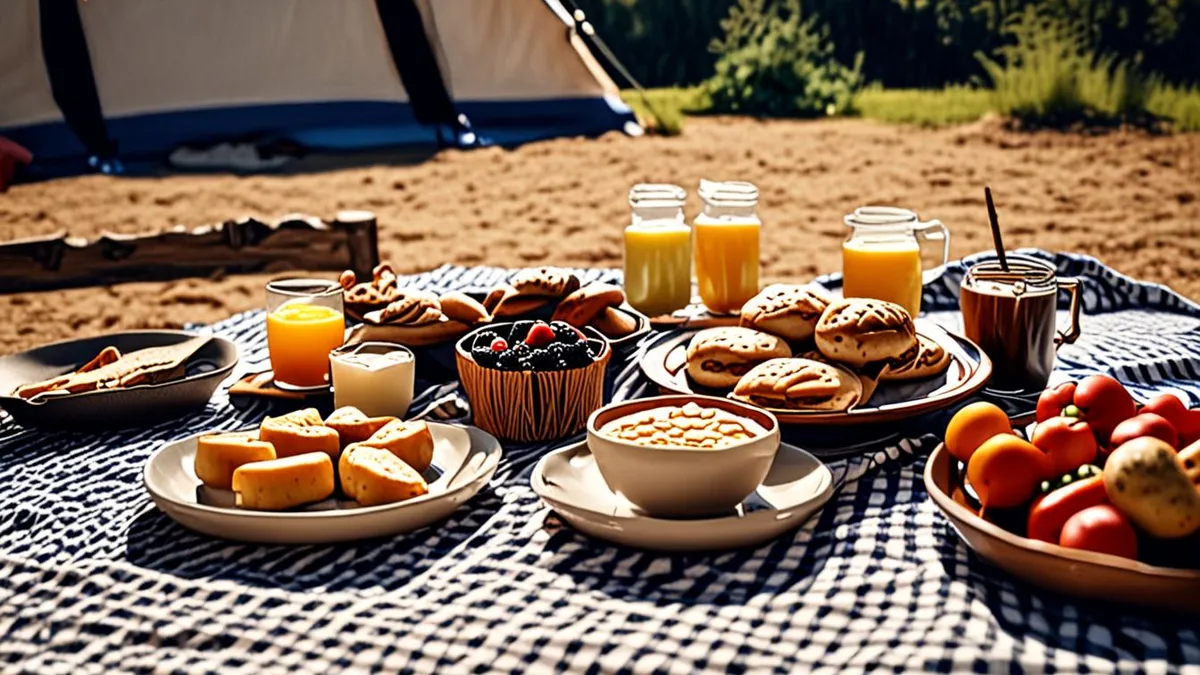
No-cook doesn’t mean sad. With a cooler and a little prep, you can eat genuinely good food for days without touching a stove. The trick is choosing meals that are filling, travel well, and don’t require last-minute assembly beyond a quick chop or unwrap. Think of it as building meals from components you prepared at home, rather than cooking on site.
Breakfast is the easiest meal to go no-cook, since most people don’t want to fuss in the morning anyway. Lunches work well as assemble-on-site wraps and boxes. Dinners take the most creativity, but a generous spread can feel like a treat rather than a compromise. Some ideas that hold up well:
- Overnight oats — mix oats with milk in a jar the night before; by morning you have a cold, creamy breakfast with no prep at all.
- Bagels with nut butter — sturdy, filling, and they survive a cooler or a dry bag better than sliced bread.
- Wraps with pre-cooked chicken — slice or shred the chicken at home, then add greens and a sauce at the site for a lunch that eats like a real sandwich.
- Hummus and veggie boxes — portion hummus into small containers and pack pre-cut carrots, cucumbers and peppers for dipping.
- Charcuterie-style boards — cured meats, hard cheeses, crackers and dried fruit make a dinner that feels indulgent and needs zero heat.
- Canned soups heated on a fire — a warm option if your site allows fires, and otherwise a backup you can enjoy at home post-trip.
Don’t forget snacks, since outdoor days burn real energy. Pack about 2 snacks per person per day: trail mix, jerky, and fruit that travels well like apples or oranges. A stash in your day bag keeps everyone from getting cranky between meals.
Food Storage and Cooler Strategy Without a Fridge
Your cooler is your refrigerator on a kitchenless glamping trip, so it pays to get this right. A 40-50 quart cooler is the sweet spot: big enough for your food and ice, small enough to fit in most tent setups. Fill it with ice blocks rather than loose cubes, since blocks melt slower and keep the interior cold for about 2-3 days.
Here’s a trick that saves space and does double duty: freeze water bottles at home before you leave. They work as ice packs on the way in, and as they thaw you have cold drinking water ready to go. Just leave a little headspace in each bottle before freezing so they don’t split.
Keeping food safe in warm weather
Raw meat is the riskiest item in any cooler, so pack it in a sealed container on the bottom, away from ready-to-eat food. On summer stays above 75°F, honestly consider skipping raw meat entirely and leaning on pre-cooked or shelf-stable proteins instead. Keep the cooler in the shade, open it as little as possible, and you’ll stretch your ice much further.
Don’t forget water itself. If the site doesn’t advertise potable water, plan on bringing 2-3 liters per person per day for drinking, plus a bit extra for coffee and cleanup. A full packing rundown, cooler included, is in our complete glamping packing checklist.
Match Your Menu to the Season
The season you travel in should shape your menu as much as the site’s amenities do. Hot food that sounds great in October can be unappealing during a heatwave, and a cooler of deli salads behaves very differently in July than in April.
Summer: think cool and shelf-stable
For summer stays above 75°F, favor no-cook, heat-safe foods. Wraps, hummus, cured meats, hard cheeses and whole fruit all hold up far better than mayonnaise-heavy salads or anything that spoils quickly. Store your cooler in the shadiest spot you can find, ideally under your tent’s awning or a tree line, and keep it out of a hot car or direct sun.
Spring and fall: bring on the warm meals
Cooler months are made for warm one-pot meals cooked over a fire pit or camp stove. Chili, stews and foil-packet dinners hit the spot when evenings turn chilly, and the fire itself becomes part of the experience. Before you plan any fire-cooked meals, check your site’s fire rules, since some locations restrict or ban open flames depending on conditions. A quick message to the host saves you from planning an entire menu around a fire pit you can’t use.
It’s also worth thinking month by month. Early spring can still be cold enough for cocoa and soup, while late May can feel like summer. Glancing at the forecast a few days before you shop and prep will tell you which direction to take your menu.
Minimal Gear Worth Packing for Cooking-Free Meals
The good news about cooking-free meals is that you don’t need much gear. A sharp knife, a cutting board, a can opener and reusable plates cover 90% of what a no-kitchen trip requires. Add a spoon or spork per person and you’re nearly done. The goal is to pack light but not so light that you’re slicing bagels with a hotel key.
Cleanup matters just as much as prep. Without a sink, you’ll want a simple system: biodegradable soap, a small wash basin and a stash of trash bags. Wipe plates with a paper towel first, wash in the basin away from any water source, and pack out everything you packed in. Many glamping sites are leave-no-trace properties, and hosts notice guests who treat the site well.
The short list
- Sharp knife with a sheath or blade guard — a loose blade rattling in a bag is how fingers and gear get damaged; a simple plastic guard costs little and adds safety.
- Small cutting board — a flexible one doubles as a funnel for pouring pasta salad into bags and rolls up to save space.
- Can opener with a bottle opener built in — one tool handles canned soups, beans and drinks without extra weight.
- Mesh bag for drying dishes — hang it from a tree branch or chair so washed plates air-dry instead of collecting moisture in a bin.
- Sealable bags in two sizes — handy for leftovers, marinating at camp and corralling trash scraps before they go in the main bag.
One final note on the camp stove: pack one only if you’ve confirmed that fires or stoves are allowed on site. Some tent sites prohibit open flames and fuel burners alike, so get the host’s answer in writing before you add it to the car.
Eating Well With No Kitchen, Wrapped Up
So, what will you actually eat for three days at a kitchenless glamping site? A short, realistic menu built around no-cook meals, backed by a well-packed cooler and a few basic tools like a knife and cutting board. Check what amenities your site really has before you go, prep everything 1-2 days before departure, and let the season guide your choices — cooling foods for hot summer days, warmer one-pot ideas for spring and fall.
None of this requires chef skills or a car full of equipment. It just takes a little planning up front, and then eating well outdoors becomes part of the adventure rather than a problem to solve. If this helped you plan your own trip, leave a comment or share this article with a fellow traveler.