Glamping in winter sounds like a dream: snow falling outside the canvas, a wood stove crackling inside, and a real bed waiting at the end of a cold hike. But there’s usually one worry that holds people back. Will a tent, even a luxury one with a heater and a plush duvet, actually be warm enough to sleep in when the temperature drops after dark?
The good news is that a properly set up winter glamping tent can be genuinely cozy, and the difference comes down to preparation rather than luck. In this guide, we’ll look at how winter trips differ from summer ones, how to pick a site that’s truly built for cold weather, and how tent heating, bedding and clothing choices keep you comfortable through the night. We’ll also cover the best months and regions for a snowy (or pleasantly mild) tent stay, so you can book with confidence.
Why Glamping in Winter Is Different From Summer Trips
A luxury tent that feels perfect in July can be a very different place to sleep in January. Cold nights, shorter daylight hours and snow-covered access paths all change what a tent has to deliver. In summer, your priorities are shade, airflow and a fan. In winter, everything hinges on heating, insulation and reliable hot water.
Daylight matters more than most first-timers expect. In December and January, you may have only eight or nine usable hours of light, which means you’ll arrive, cook and settle in by headlamp unless you plan around it. Snow also changes the logistics: the walk from your parking spot to the tent can be slippery, and a site that’s a two-minute stroll in summer may feel longer with a suitcase in one hand.
What a winter tent must do differently
A winter-ready luxury tent leans on insulated canvas or dome panels, a real heat source such as a wood stove or propane heater, and hot water that doesn’t depend on an outdoor summer shower. Comfortable winter tent nights usually rely on indoor temperatures of at least 60-65°F (16-18°C), so it’s fair to ask any operator exactly how they hit that range.
The upside of going off-season
The trade-offs come with real perks. Winter sites are quieter, the scenery is often at its most dramatic, and rates typically run 20-40% below peak summer prices. You get the same tent, the same views and far fewer neighbors.
Choosing a Winter-Ready Glamping Site
Not every glamping site stays open once temperatures drop, and not every tent that stays open is genuinely built for winter. Before you book, ask whether the tent is rated for cold-season use. Look for signs of real cold-weather construction: double-wall or quilted canvas, insulated dome panels, a proper heat source such as a wood stove or propane heater, and ideally heated floors in geodesic domes, which make a noticeable difference underfoot.
Then ask the operator directly how heat runs overnight. Some sites expect you to refuel a wood stove yourself at 2 a.m.; others have staff who relight stoves in the morning or deliver firewood to your tent each evening. The answer tells you a lot about whether you’ll wake up comfortable or shivering.
Access is the other big question. A beautiful site is no fun if the road to it isn’t plowed. Our guide on how to choose the right glamping site for your first trip covers the basics of vetting any site, and in winter you’ll want to dig a little deeper:
- Winter road access: ask whether the access road is plowed regularly after snowfall and whether a four-wheel-drive vehicle is recommended.
- Parking distance: find out how far you’ll walk from your car to the tent, and whether the site provides sleds or staff help with luggage in snow.
- Snow-clearing policies: confirm who clears the path between your tent and the bathhouse or restroom, and how quickly after a storm.
- Lighting on walkways: with early sunsets, ask whether paths and tent entrances are lit or whether you should carry a headlamp.
Finally, book early for popular dates. For holiday weekends between November and March, plan on reserving 2-3 months ahead, since winter-ready tents are far fewer in number than summer stock.
How Tent Heating Keeps You Warm All Night
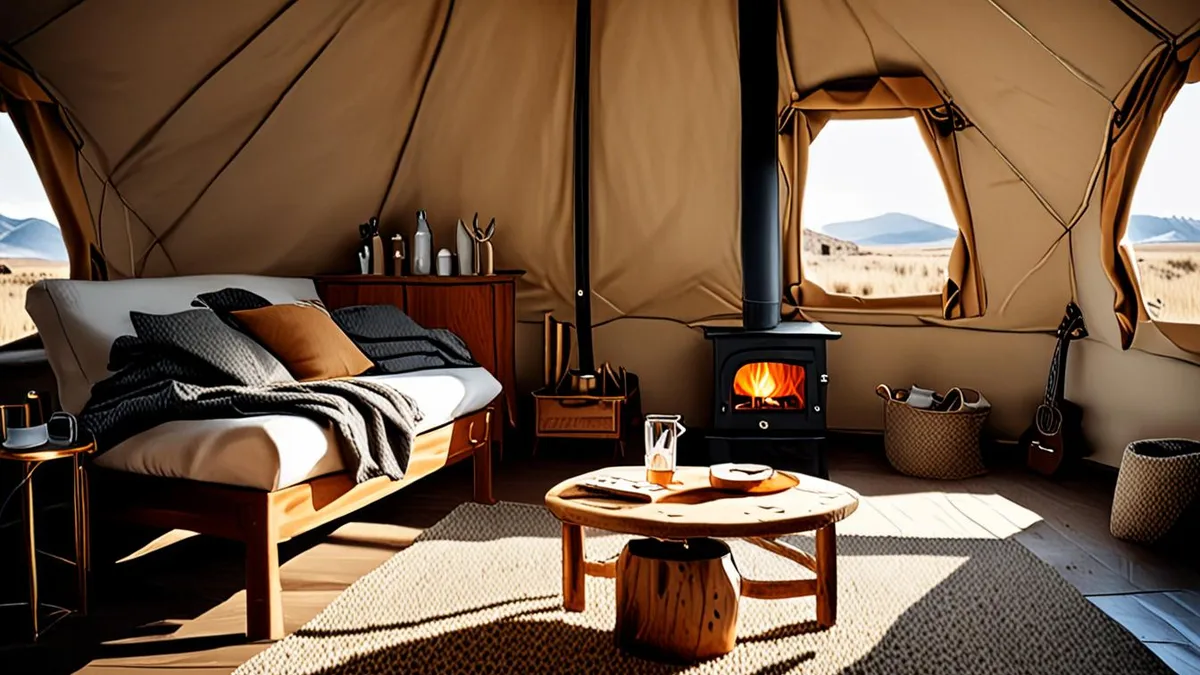
Heating is the heart of a winter glamping stay, and the type of heater in your tent shapes your whole night. Wood stoves and propane heaters are the most common luxury tent heat sources, and each comes with its own rhythm. Before you book, it helps to know how each option behaves overnight and what to ask the operator.
Wood stoves: cozy, but they need feeding
A wood stove is the classic winter glamping image for good reason. The catch is burn time: most stoves run about 4-6 hours per load, which means the fire you light at bedtime may die out before dawn. Ask the operator whether staff refuel stoves overnight or relight them in the morning, or whether you should expect a morning chill and plan to layer up while you restart the fire. If you like tending a stove, it’s part of the charm; if you don’t, it’s a dealbreaker worth knowing in advance.
Propane, electric and heated floors
Propane and electric heaters are generally safer for unattended overnight heat, since many models include tip-over shutoffs and can run on a thermostat. Check whether your tent has thermostat control so you can set a steady temperature instead of cycling between hot and cold. Heated floors and insulated domes are the premium option: they hold indoor temperatures of 60-65°F (16-18°C) with far less effort than basic canvas, so the tent stays comfortable even as the stove burns down.
One rule applies to every setup: keep a window or vent slightly open whenever a fuel-burning heater is running. Fresh airflow is essential for safe combustion, and a small vent won’t undo the heat your stove or heater is putting out.
Heating also connects to timing. If you’re targeting a holiday weekend, remember that winter glamping sites typically need to be booked 2-3 months ahead, and the right heater setup matters most during the coldest stretches of the season. For help picking when to go, the month-by-month guide to glamping seasons across the US breaks down what each part of winter offers.
Bedding and Sleep Setup for Cold Nights
A great winter glamping night starts with the bed, not the heater. Even in a well-heated tent, cold seeps up from the ground and the canvas walls after midnight, so your bedding needs to work in layers the same way your clothing does. The goal is a setup that traps warm air around your body without smothering you in weight.
Start with a flannel sheet on the mattress, then add a wool or down duvet, and finish with a blanket rated about 10°F below the forecast low. That buffer matters because tent temperatures dip faster than cabin temperatures once the stove dies down. If you want a full rundown of what else belongs in your bag, this glamping packing checklist covers the essentials from head to toe.
- Warm the bed before you get in: fill a hot water bottle or wrap a stove-warmed stone in a towel and slide it under the covers at your feet about 20 minutes before bedtime, so the duvet has time to hold that heat.
- Sleep in dry base layers and a beanie: a surprising amount of body heat escapes through your head, and a light beanie plus thermal layers keeps you warm without the suffocating weight of three stacked blankets.
- Pre-warm tomorrow’s clothes: tuck the next day’s base layers and socks inside the sleeping bag or under the duvet overnight, so getting dressed at dawn feels like a treat instead of a shock.
- Change out of anything damp first: snow-dusted socks or a sweaty thermal shirt will chill you fast, so keep a dedicated dry set just for sleeping.
One last habit worth building: crack the tent’s vent or window slightly before bed, even when it’s freezing outside. Fresh airflow keeps condensation off the canvas and off your bedding, and damp bedding is the fastest way to lose a warm night’s sleep.
What to Wear and Pack for a Winter Tent Stay
Getting dressed right is the difference between strolling to the bathhouse and dreading every step across the snow. Winter tent stays mean constant transitions between a heated interior and freezing air, so your clothing needs to handle both worlds without making you sweat or shiver. The standard three-level system works perfectly here: a moisture-wicking base, an insulating fleece or wool mid-layer, and a windproof outer layer you can pull on or off as conditions change.
Footwear deserves special attention. The path from your tent to the bathhouse or dining lodge is often packed snow or ice, sometimes lit only by lanterns, so plan for it as seriously as you would for a short hike. And because December and January days are short, you’ll be walking those paths in the dark more often than not.
- Insulated waterproof boots: choose a pair with good tread for icy boardwalks, and leave them just inside the tent door so they don’t freeze solid overnight.
- Wool socks and gloves: pack at least two spare pairs of socks, since one wet pair on a snowy evening can end a day’s comfort, and liner gloves let you handle zippers and stove dampers without bare fingers.
- A headlamp: hands-free light beats a phone flashlight for navigating paths, refueling a wood stove or finding the thermos in the dark, and short winter days make it a daily tool rather than a backup.
- A thermos: fill it with coffee, tea or cocoa before your evening walk, because a hot drink in hand makes a five-minute stroll in the cold feel like part of the experience instead of a chore.
One packing rule matters more than any other: skip cotton. Jeans and cotton sweatshirts absorb moisture from snow, breath and sweat, then stay damp and cold for hours, which is miserable when you have nowhere warm to dry them. Synthetic blends and wool dry faster and keep insulating even when damp, which is exactly what a tent stay demands.
Best Months and Regions for Winter Glamping
Timing shapes everything about a winter glamping trip, from what you pack to how much you pay. The winter season in most of the US runs roughly November through March, but those months are far from equal. Your first decision should be what kind of winter you actually want, because the country offers three very different versions of it.
Shoulder months: November and March
For most travelers, November and March hit the sweet spot. Nights are cold enough to justify a wood stove and a hot drink, but daytime temperatures stay manageable and roads are easier to drive than in deep winter. You also sidestep the holiday rush, which means better availability and calmer sites. And because demand dips outside the holidays, these shoulder months are where off-season pricing tends to be at its most generous, so it pays to compare dates across the season.
Deep winter and mild-winter alternatives
If snow is the whole point, aim for December through February in mountain states like Colorado, Montana and upstate New York. These regions deliver the postcard scenery: snow-dusted pines, steaming mugs on a tent deck, and genuinely quiet mornings. Just confirm road access and snow-clearing policies before you book, because mountain conditions change quickly.
Prefer to skip the freeze entirely? The desert Southwest and Gulf Coast states offer mild winters where nights rarely drop below freezing. You still get crisp evenings and a reason to light a fire, but without ice on the walkway or chains on your tires.
Match the region to your goal before you fall in love with a listing. Snow play calls for the mountain states, quiet solitude favors remote shoulder-season sites, and mild weather points you south. Once you know which trip you’re planning, every other decision, from bedding to boots, gets much easier.
Wrapping Up Your Winter Glamping Plan
A luxury tent can absolutely be warm enough for a winter night, as long as three things line up: the tent is built for cold with insulation and a real heat source, the heating runs overnight rather than dying out at midnight, and your clothing and bedding match the forecast. Get those right, and falling asleep to the sound of snow outside becomes a highlight instead of a worry.
Start by picking your month and region, since that choice shapes everything else. For stays over the winter holidays, reserve your tent well in advance — a couple of months out is a sensible target, since those dates fill fast even in the off-season. As a reward, winter rates often run 20-40% below summer prices. Before you pay, confirm the overnight heating setup, the bedding provided and winter road access to the site. If you’ve tried a cold-weather tent stay, share how it went in the comments or pass this along to a friend who needs a snowy escape.