There’s a special kind of disappointment that hits when you unzip your tent at midnight, look up, and see only a handful of faint stars washed out by a glowing horizon. You booked a glamping trip hoping for a night full of stars, only to arrive at a site blunted by nearby city lights and a bright moon. The truth is, great stargazing doesn’t happen by accident — it depends on where you go, when you go, and how the property is set up.
This guide walks you through picking a proper dark sky site, from understanding Bortle classes and moon phases to choosing accommodation with a view of the heavens. We’ll also cover how to vet a listing before you book, what to pack for long nights outside, and how to make the most of your time under the stars. A quick checklist at the end pulls it all together so your next glamping trip ends with a sky full of stars instead of a glow.
What Makes a Great Dark Sky Site for Stargazing Glamping
The single biggest factor in stargazing quality is how dark the sky actually is, and astronomers use the Bortle scale to measure it. Class 1 skies are as dark as it gets — the Milky Way casts a visible shadow on clear nights. Bortle Class 1-3 skies give you the clearest views of faint objects, star clusters, and the glowing band of our galaxy. Once you slip into Class 5 or higher, noticeable light pollution starts erasing the dimmer stars, and by Class 8 or 9 you’re essentially stargazing through a city glow.
Distance from cities matters more than you’d think
Urban light doesn’t stop at the city limits. It throws a dome of glow that can be seen from tens of miles away, drowning out everything near the horizon. As a rule of thumb, sites 30-50 miles from major cities sit outside most urban light domes. That’s why the best stargazing spots tend to cluster in deserts, high plains, and remote mountain valleys rather than the outskirts of metro areas.
Look up, and look around
Elevation helps too — higher ground puts you above some haze and ground-level light. Just as important is what surrounds the site itself. Open meadows and desert terrain give you a wide, unobstructed view from horizon to horizon, while a forest clearing often cuts your visible sky down to a small patch overhead. When comparing listings, favor properties that advertise open horizons, especially toward the south where the Milky Way core rises.
Timing Your Trip Around the Moon and the Milky Way
Even the darkest location on the map can be ruined by the wrong night. The moon is the biggest variable you control: a full moon acts like a giant floodlight, washing out faint stars and the Milky Way entirely. For the darkest possible skies, plan stays 3-5 days around the new moon, when the moon rises and sets with the sun and leaves the night truly black. A five-night stay straddling the new moon gives you several prime viewing nights even if one evening clouds over.
Season matters just as much. The bright, dense core of the Milky Way — the part with the dust lanes and glowing bulge — shows best from about April to September in the Northern Hemisphere. Pair that with comfortable conditions and you get a sweet spot: the best stargazing season in the US runs roughly May through October, when nights are mild enough to spend hours outside without shivering. For a fuller breakdown of what each month offers, this month-by-month guide to glamping seasons in the US is a handy reference.
- Meteor showers can double your reward. The Perseids peak in mid-August and the Geminids in mid-December, so a new-moon trip timed to one of these can deliver dozens of shooting stars per hour alongside the Milky Way.
- Shoulder seasons trade brightness for solitude. April and October nights run colder, but you’ll often find easier availability and darker, crisper air than in humid midsummer.
- Check moonrise times, not just the phase. A waxing moon that sets by 10 pm still leaves you a dark second half of the night for viewing.
Choosing the Right Accommodation for Night-Sky Viewing
If you’re new to the whole concept, glamping is simply camping with the comfort dialed up — real beds, solid structures, and often a few luxuries — and it turns out some operators design their setups specifically around the night sky. If that sounds appealing, our beginner’s guide to luxury camping covers the basics of how it all works. These properties treat darkness as an amenity, the way a beach resort treats ocean views.
Sleep under the stars, literally
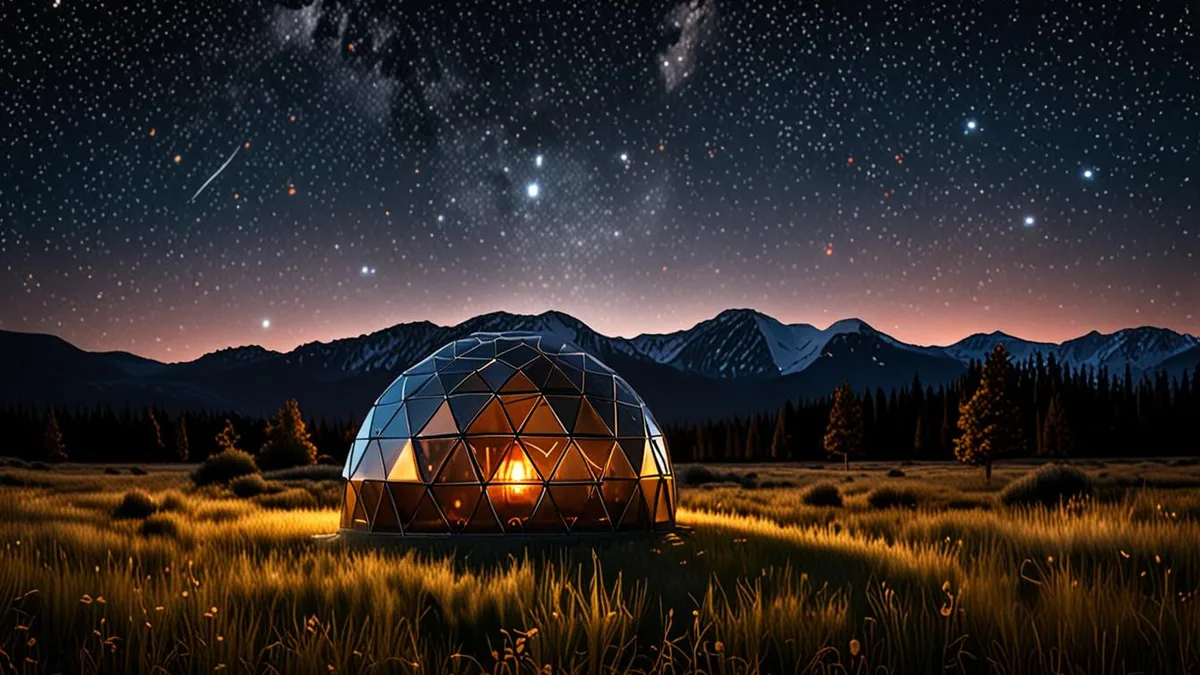
The gold standard for stargazing glamping is a clear-roofed or stargazing dome, or a tent with a mesh skylight positioned over the bed. These let you watch the sky drift overhead from under a blanket, which is a genuine pleasure on cold nights when you’d rather not stand outside. Some domes even have adjustable blinds so you can block morning light after a late viewing session.
Standard structures can still work well
You don’t need a transparent roof to have a great night. A well-placed cabin or yurt works fine if the property has a dedicated viewing deck, an open meadow, or a fire pit area set back from the buildings. What matters is that there’s a comfortable, light-free spot to lie back or recline with an open view of the sky. Before booking, look at photos of the surroundings, not just the accommodation itself.
On price: expect roughly $150-$400 per night for dark-sky-oriented glamping setups, depending on the structure, location, and amenities. Basic sky-view tents sit at the lower end, while high-end domes with heating, bathrooms, and telescopes push toward the top of that range. Check current rates with the operator, since they vary by season and demand.
Vetting a Site Before You Book
Photos can make any tent look like it sits under a blanket of stars, so verify the sky quality yourself before you pay a deposit. Free light pollution maps let you type in the site’s approximate location and see its Bortle class at a glance. If the map shows Class 5 or higher, keep searching, no matter how appealing the listing photos are. It takes two minutes and can save you from an expensive disappointment on arrival.
While you have the map open, zoom out and check the distance to the nearest city. A site that looks dark on the map can still sit inside a city’s light dome, which washes out the fainter stars along the horizon. Hosts who list their coordinates or a rough location make this check easy; those who keep it vague are worth a follow-up question before you commit.
Listing language also tells you a lot. Hosts who care about night skies usually say so plainly, and they tend to describe the specifics that matter for stargazing rather than just the hot tub and the decor. Read the description with the checklist below in mind, and note which boxes the host ticks without being asked.
- Dark sky designation: Some sites sit near formally recognized dark sky places, which usually means surrounding communities keep lighting controlled too.
- Astronomy amenities: Look for mentions of telescope pads, loaner binoculars, star charts in the tent, or a designated viewing deck away from the buildings.
- Southern horizon views: In the Northern Hemisphere the Milky Way core arcs across the southern sky, so a site with an open southern view shows you far more than one ringed by trees or ridgelines.
- Lighting policy: Ask hosts directly whether exterior lights are on motion sensors, dimmers, or switched off after a set hour, since one bright porch bulb can wash out half the sky.
If a host answers these questions quickly and specifically, that is usually a good sign they know their site well. Vague or evasive replies, on the other hand, suggest the sky views may not live up to the photos. For a broader framework on comparing properties, this guide on how to choose the right glamping site for your first trip pairs nicely with the checks above.
Booking Lead Times and What to Pack for Stargazing Nights
Dark sky sites are no secret anymore, and the best ones sell out fast. For peak summer weekends that coincide with the new moon, plan to reserve 2-3 months ahead. Popular properties near recognized dark sky areas often have only a handful of stargazing units, so a single weekend can be fully booked well before the month begins.
If your dates are flexible, midweek stays are easier to land and often quieter, which helps when you want silence and zero stray light around your tent.
Packing for a Night Outside
Even on summer nights, temperatures at elevated or desert sites can drop sharply after sunset, so pack extra warm layers regardless of the forecast at lower elevations. A red-light headlamp is essential because red light preserves your dark adaptation, while a white flashlight resets it in a second.
A reclining chair or a thick pad to lie on makes long sky sessions far more comfortable than craning your neck from a regular camp chair. Add a thermos of something hot and a blanket, and you can comfortably stay out for hours.
Binoculars Over Telescopes
You do not need a telescope to have a memorable night. A decent pair of binoculars costs a fraction of one, weighs almost nothing, and reveals far more of the Milky Way’s structure, star clusters, and nebulae than the naked eye alone. For most first-time stargazers, binoculars plus a dark sky beat a telescope they have never used before.
Making the Most of Your Dark Sky Night
The first ten minutes under a truly dark sky can feel underwhelming, and that is completely normal. Your eyes need 20-30 minutes to fully adapt to darkness, and every flash of white light during that window sends you back to the start. Once adapted, you will see thousands of stars instead of a few dozen, plus faint details like the glow of the Milky Way that most people never notice from home. The patience pays off, so treat the adaptation period as part of the evening rather than a delay. Settle into your chair, skip the flashlight, and give your vision time to do its work.
Remote glamping sites frequently have weak or no cell signal, so do not count on streaming a stargazing app at the tent. Download your apps and offline star maps before you leave home, and consider a printed planisphere as a battery-free backup. It also helps to review star charts earlier in the day, when your screen use cannot ruin anyone’s night vision.
- Switch every light to red: Cover phone screens and flashlights with red film or use a red-light mode, since even a brief white flash can cost you another full adaptation cycle.
- Keep phones face-down or in airplane mode: A glowing screen inside a tent lights up the whole interior and can spill onto neighbors’ viewing spots.
- Aim for the 10 pm to 2 am window: Skies are typically steadiest and darkest in these hours, after evening twilight fully fades and before any pre-dawn brightening.
- Let your gear acclimate: If you bring binoculars or a camera, give them time to reach the outside temperature so lenses stay clear and focus stays sharp.
Plan your evening backwards from that viewing window: eat early, set up your chairs and blankets while there is still light, and then simply wait for the sky to do its thing. A thermos of something warm makes the waiting genuinely pleasant, and you will find the quiet half hour before full darkness is part of the charm of a night under the stars.
Your Stargazing Glamping Checklist at a Glance
A washed-out night sky usually comes down to three things: too much light pollution, a bright moon, or a site with no real sky view. The fix is simple. Pick a Bortle Class 1-3 location at least 30-50 miles from a major city’s light dome, and time your stay within 3-5 days of the new moon. That combination gives you the darkest skies a glamping trip can offer.
From there, the details fall into place. Choose accommodation with built-in sky views, like a clear-roofed dome, and book 2-3 months ahead if you’re aiming for a peak summer new-moon weekend. Pack red-light headlamps and extra warm layers, since desert and meadow nights turn cold even in summer. Once you arrive, give your eyes 20-30 minutes to adapt, keep every light red, and settle in for the show. If this helped you plan your own night under the stars, leave a comment or share the article with a fellow stargazer.